M.blue plus®
Instruments
M.blue®
VALVE ADJUSTMENT

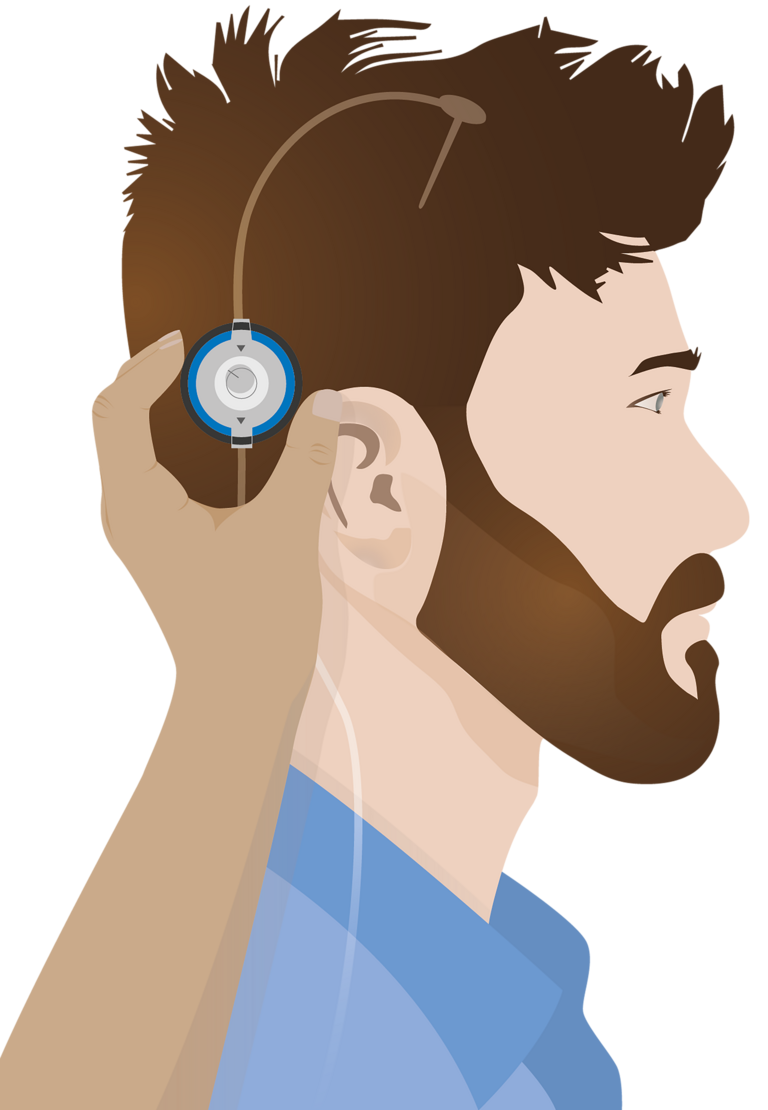
It is recommended to first feel the valve and locate the inlet and outlet with your fingers.
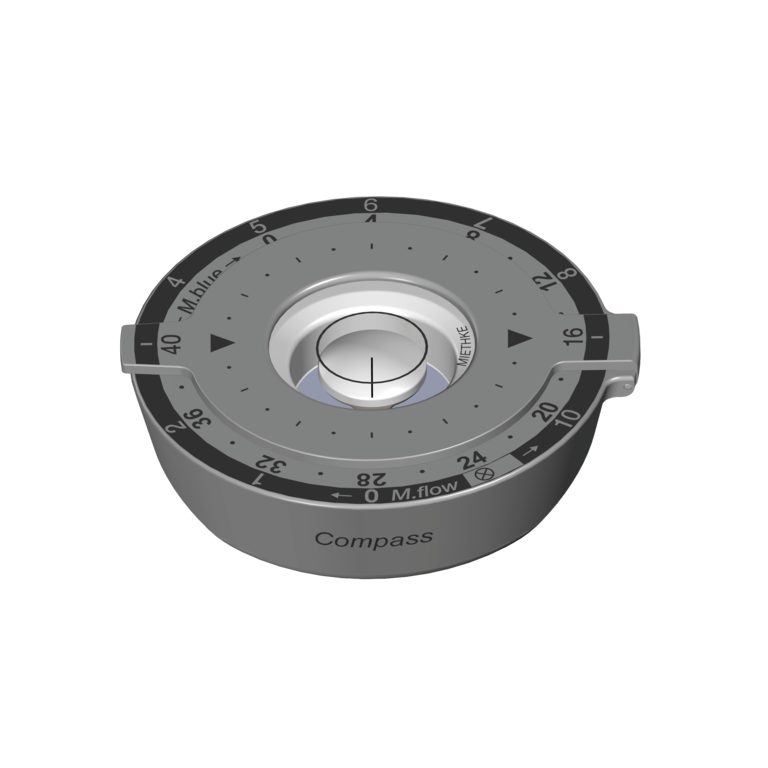
Then place the open M.blue plus compass on the valve so that the direction of flow is correctly aligned with the arrow markings on the compass. Now the compass is closed and fine-tuned by very light movements of the instrument. If the float in the center of the compass is centrally aligned within the mark, the instrument is in the correct position for all further steps.

Once the float is centered, the currently set opening pressure can be read out from the line mark on the float.
Simply follow the line mark up to one of the two scales: For the opening pressure of the adjustable differential pressure unit (proGAV 2.0), the setting range of 0-20 cmH2O on the outer scale applies, which is highlighted in light grey. For the opening pressure of the gravitational unit of the M.blue the blue marked setting range of 0-40 cmH2O of the inner scale applies.

To adjust the opening pressure, the compass is opened without leaving its position.
The M.blue plusadjustment ring can now be inserted into the resulting opening in the middle. The marking on the adjustment ring should point to the desired opening pressure of the corresponding M.blue or proGAV 2.0scale. By applying light pressure with the index finger on the valve diaphragm which is located under the skin in the middle of the adjustment ring, the rotor brake is released and the opening pressure of the valve is changed to the desired value.
When adjusting the differential pressure unit of the proGAV 2.0, make sure that the opening pressure is changed by a maximum of 8 cmH2O per adjustment process or by a maximum of 16 cmH2O per adjustment process when adjusting the gravitational unit of the M.blue, otherwise errors may occur. After each adjustment, the set pressure level should be checked as described in steps 1 and 2.
M.flow®
Instruments
M.flow®
VALVE ADJUSTMENT
![[Translate to English:] M.flow Instrumente Lokalisieren The M.flow compass is used to determine and set the throttle level of the M.flow.](/fileadmin/_processed_/3/e/csm_MIETHKE_Mflow_INM_lokalisieren_aef95af73e.png)
Once the M.flow has been localised, the inlet and outlet must be felt. The open M.flowcompass is now placed on the valve so that the M.flow is as centred as possible and the arrow markings match the direction of flow. Now close the compass and adjust the position so that the float is centred in the marking.
![[Translate to English:] M.flow Instrumente prüfen The M.flow compass is used to determine and set the throttle level of the M.flow.](/fileadmin/_processed_/1/f/csm_MIETHKE_Mflow_INM_pruefen_63c5c31766.png)
When the float is centred in the compass, the set flow-reduction level can be read off using the marking. The line mark on the float points to the set flow-reduction level, which can be read on the outer scale (0-10 and "real Off"). The inner scale (0-40 cmH2O) allows the opening pressure of the gravity unit of the M.blue to be read.

To adjust the flow-reduction level of the M.flow, open the compass without changing its position. The adjustment ring is now inserted into the opening of the compass so that its line mark points to the desired value. It is important to change the flow-reduction level by a maximum of 4 steps per procedure, otherwise errors may occur. Pressing lightly with your finger on the M.flow releases the rotor brake and the flow-reduction level changes. After each adjustment, the set flow-reduction level should be checked as described.
proGAV® 2.0
Instruments
proGAV® 2.0
VALVE ADJUSTMENT

The proGAV 2.0 Compass is used to locate and read out the set opening pressure.
The valve can be easily felt with the finger using the integrated template of the opened proGAV 2.0 Compass.

Now the proGAV 2.0 Compass is placed on the valve in flow direction and closed again. The proGAV 2.0 Compass will now display the set opening pressure.

The desired opening pressure is first selected on the proGAV adjustment instrument.
The proGAV adjustment instrument is now positioned on the valve in accordance with the operating instructions. By lightly pressing the release button, the "Active-Lock" mechanical coupling is released and the desired opening pressure is set.
proGAV®
Instruments
VALVE ADJUSTMENT

First, locate the proGAV by palpation. The proGAV VERIFICATION COMPASS is an auxiliary instrument for locating the proGAV.
As the proGAV VERIFICATION COMPASS is held above the valve, the floating disc aligns over the adjustable unit of the proGAV. The current opening pressure setting can be read from the compass scale.

Position the proGAV VERIFICATION TOOL central on the valve. The marking and the readout display on the proGAV VERIFICATION TOOL must be in line with the proximal (ventricular) catheter. Press the trigger button to see the actual opening pressure setting displayed on the readout.

Select the appropriate opening pressure on the proGAV ADJUSTMENT TOOL.
Position the proGAV ADJUSTMENT TOOL centrally over the valve. The marking and the readout display of the proGAV ADJUSTMENT TOOL must be in line with the proximal (ventricular) catheter. Unlock the rotor ("Active-Lock") by applying mild pressure on the trigger button and then check the setting with the proGAV VERIFICATION TOOL.
proSA®
Instruments
proSA®
VALVE ADJUSTMENT

First, locate the proSA palpation. The proSA VERIFICATION COMPASS is an auxiliary instrument for locating the proSA.
As the proSA VERIFICATION COMPASS is held above the valve, the floating disc aligns over the adjustable unit of the proSA. The current opening pressure setting can be read from the compass scale.

Position the proSA VERIFICATION TOOL central on the valve. The marking and the readout display on the proSA VERIFICATION TOOL must be in line with the proximal (ventricular) catheter. Press the trigger button to see the actual opening pressure setting displayed on the readout.

Select the appropriate opening pressure on the proSA VERIFICATION TOOL.
Position the proSA VERIFICATION TOOL centrally over the valve. The marking and the readout display of the proSA VERIFICATION TOOL must be in line with the proximal (ventricular) catheter. Unlock the rotor ("Active-Lock") by applying mild pressure on the trigger button and then check the setting with the proSA VERIFICATION TOOL.
DO YOU HAVE ANY QUESTIONS ABOUT THE PRODUCT?
WE ARE THERE FOR YOU

OUR PARTNERSHIP
WITH B. BRAUN
B. Braun and MIETHKE - Together for a better life with hydrocephalus
We have a long and intensive partnership with B. Braun in the field of neurosurgery. We are driven by a common vision: to improve the lives of hydrocephalus patients around the world with innovative solutions.
Our partnership is an exciting combination of B. Braun's nearly 180 years of expertise as one of the world's leading medical device and pharmaceutical companies and our agility as an innovative company and technology leader in gravitation-based shunt technology.
Our strong partner in neurosurgery:


